Knowledge base

AT&T: iPhone displays 'Inbox is full' when checking Visual Voicemail

Posted in Apple Portable Computers

To resolve the "Inbox is full" issue, verify that you are deleting messages saved on the AT&T voicemail server instead of those saved on your iPhone. You can do this using one of the following steps:

  • Listen to and delete the recent voicemail messages on your iPhone.
  • Call your AT&T voicemail by pressing and holding 1 or by dialing your own phone number, then listen to and delete the messages directly from the AT&T voicemail server.

Read Full Article

Apple TV (3rd generation): Using an iOS device to set up your Apple TV

Posted in Apple Portable Computers

Learn how to set up your Apple TV (3rd generation) using an iOS 7 device.

With Apple TV software 6.0 or later, you can set up your Apple TV (3rd generation) by transferring the following from your iOS 7 device:

  • Wi-Fi network and password
  • iTunes Store account
  • Language and region format preferences

System requirements

To use your iOS device to set up Apple TV, you need the following:

  • Apple TV (3rd generation) using Apple TV software 6.0 or later
  • One of these iOS devices using iOS 7 or later
    • iPhone 4s or later
    • iPad (3rd generation or later)
    • iPad mini
    • iPod touch (5th generation)

Setting up your Apple TV

Follow these steps to set up your Apple TV (3rd generation) using your iOS 7 device.

  1. Connect your Apple TV to your television and power and wait until your Apple TV displays the setup screen.
  2. Unlock your iOS 7 device and ensure that Bluetooth is enabled. Also ensure that you are connected to the Wi-Fi network you want to use with Apple TV.
  3. Touch your iOS device to your Apple TV and wait for the prompts to appear on your iOS device and Apple TV.
  4. Enter your Apple ID and password on your iOS device.
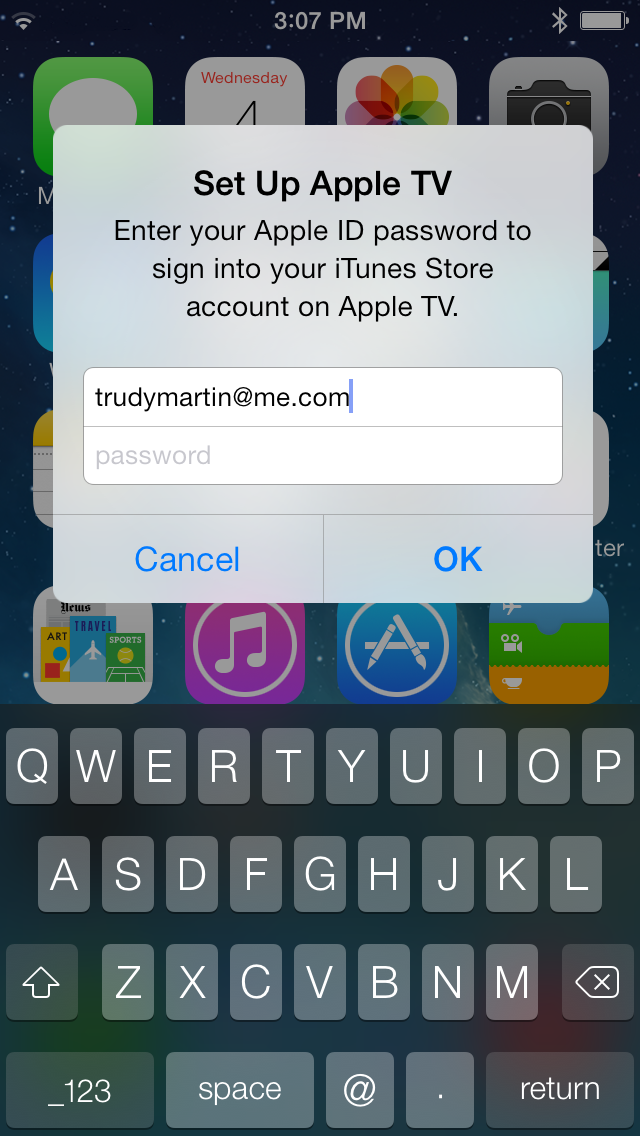
  5. Choose if you want Apple TV to remember your Apple ID password, and if you want Apple TV to send data to Apple.
    Note: This does not change your iOS device preferences.
  6. Your Apple TV will start the configuration process, including connecting to your Wi-Fi network, activating Apple TV, and setting up your iTunes Store account.
  7. When complete, your Apple TV is ready to use.

Troubleshooting tips

If you encounter an issue setting up your Apple TV using an iOS device, try the following:

  • If the Automatic Setup screen doesn't appear when you touch your iOS device to the Apple TV, verify that you:
    • Have an Apple TV (3rd generation) using Apple TV software 6.0 or later.
    • Use a supported iOS device with iOS 7 or later.
      Note:
       iPhone 4 and iPad 2 are not supported.
    • Verify that your iPhone is unlocked and that Bluetooth and Wi-Fi are on.
      • If the issue persists, press the Sleep/Wake button to lock your iOS device, then press the Home button and slide to unlock and try again.
  • While configuring your Apple TV, keep your iOS device within 10 to 15 feet of your Apple TV until the configuration process completes.
    • If you go out of range or the setup doesn't complete, restart your Apple TV by unplugging it from power for a few seconds and then reconnecting it.

If you are still unable to set up your Apple TV with your iOS device, you can set up your Apple TV with the included remote instead.

Additional Information

This feature configures only your Wi-Fi network, iTunes Store account, and region/language settings. It cannot:

  • Set up multiple Wi-Fi networks or install network configuration profiles.
  • Transfer account information for third-party services (for example, Netflix, YouTube, or Hulu Plus).
  • Enable iTunes Match, Home Sharing, an iCloud account for iCloud Photos, or the Remote app for iOS.
Important: Information about products not manufactured by Apple is provided for information purposes only and does not constitute Apple’s recommendation or endorsement. Please contact the vendor for additional information.
Last Modified: Sep 24, 2013
Helpful?
Yes
No
One Moment Please
Thanks for your feedback.
0% of people found this helpful.
Email this article
Print this page
  • Last Modified: Sep 24, 2013
  • Article: HT5900
  • Views:

    0

    Additional Product Support Information

      Apple TV: How to change the language

      Posted in Apple Portable Computers

      Learn how to change the language setting on your Apple TV if it is incorrect, or if you have accidentally changed the language to one you don't understand.

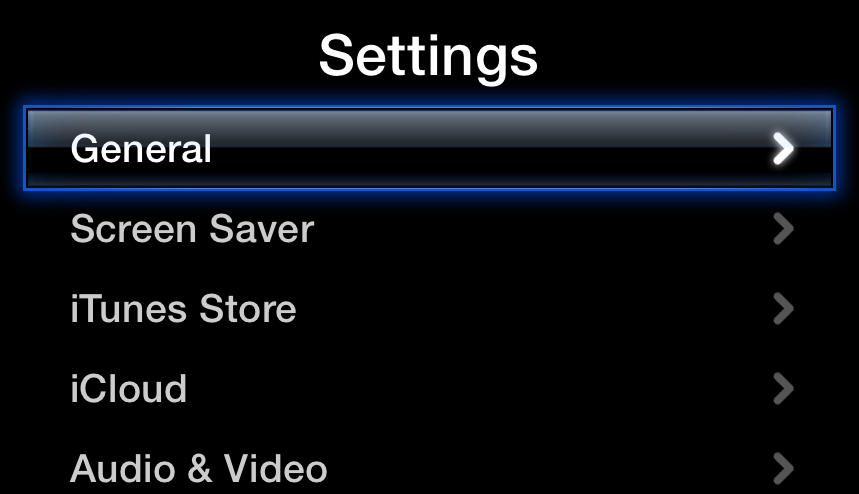
      1. From the main menu, choose Settings, which is identified by the gear icon:
      2. Select the first option from the list.
      3. Scroll down and select the option that shows a flag.
      4. Choose the desired language from the list.
      Last Modified: Sep 24, 2013
      Helpful?
      Yes
      No
      One Moment Please
      Thanks for your feedback.
      0% of people found this helpful.
      Email this article
      Print this page
      • Last Modified: Sep 24, 2013
      • Article: HT5907
      • Views:

        0

        Additional Product Support Information

        Aperture 3: Darker photos after converting library from Aperture 2 to Aperture 3

        Posted in Apple Portable Computers

        This may happen to photos that have had the Enhance adjustment brick applied with changes to the Saturation slider but not the Contrast slider. In some cases, Aperture 3 sets the Contrast slider from 0 to 1 during library conversion, resulting in images that look darker than expected.

        To fix this issue, move the Contrast slider in the Enhance adjustment brick back to 0 for any affected photos.

        Read Full Article

        iMac (Late 2013): Memory specifications

        Posted in Apple Portable Computers

        Learn which kinds of memory to use with your iMac (21.5-inch, Late 2013) or iMac (27-inch, Late 2013) computer.

        iMac (21.5-inch, Late 2013)

        iMac (21.5-inch, Late 2013) computers have two internal SDRAM slots inside the computer. The computer comes with at least 8 GB DDR3 SDRAM installed as two 4 GB DIMMs into two slots. The maximum amount of RAM the computer supports is 16 GB (an 8GB SO-DIMM in each slot).

        You can configure your iMac (21.5-inch, Late 2013) with the amount of SDRAM you'd like when you're ordering it. Installed RAM module sizes can be 4 GB or 8 GB in each slot.

        The memory DIMMs for iMac (21.5-inch, Late 2013) computers are not user-accessible. Visit an Apple Retail Store or Apple Authorized Service Provider if you need to replace your iMac (21.5-inch, Late 2013) computer's DRAM.


        iMac (27-inch, Late 2013)

        iMac (27-inch, Late 2013) computers have four SDRAM slots in a compartment located on the rear of the computer. The computer comes with at least 8 GB DDR3 SDRAM installed as two 4 GB DIMMs into two slots. The maximum amount of RAM you can install in your computer is 32 GB (an 8 GB SO-DIMM in each slot). 

        You can use any small-outline dual inline memory modules (SO-DIMMS) that meet all of these criteria:

        • PC3-12800
        • Unbuffered
        • Nonparity
        • 204-pin
        • 1600 MHz
        • DDR3 SDRAM

        You can use RAM module sizes of 4 GB or 8 GB in each slot. Memory sold by the Apple Online Store is guaranteed to be compatible with your Macintosh.

        DIMMs with any of the following features do not work in iMac (27-inch, Late 2013) computers:

        • Registers or buffers
        • PLLs
        • ECC
        • Parity
        • EDO RAM

        Always follow the upgrade instructions for memory installation. See iMac (27-inch, Late 2012 and later): Installing or replacing memory for details. 

        Last Modified: Sep 25, 2013
        Helpful?
        Yes
        No
        One Moment Please
        Thanks for your feedback.
        0% of people found this helpful.
        Email this article
        Print this page
        • Last Modified: Sep 25, 2013
        • Article: HT5908
        • Views:

          0

          Additional Product Support Information

            Logic Pro X: Use Producer Kits for maximum customization of Drum Kit Designer

            Posted in Apple Portable Computers

            Learn how to use a Producer Kit patch to get the most options and control when creating a customized drum kit in the Drum Kit Designer plug-in.

            When you add a Drummer track to a song, a stereo Drum Kit patch is assigned:
             
            If you open the Drum Kit Designer plug-in, and click on a kit piece, such as the kick drum, you have a choice of three kick drums and several adjustments to affect the sound.
             
            For each stereo drum kit patch, there is a corresponding Producer Kit patch, that besides offering multi-channel mixing, allows you much more control over the sound of the drum kit. Here is the same Drum Kit in a Producer Kit patch:
             
            Instead of the 3 kick drums available in the stereo kit, you can choose from among 13 kick drums. Scroll the list of kick drums to see additional choices. You also have control over whether the overhead mics pick up the kick drum, whether the kick drum picks up leakage from other kit pieces, and set an alternate room for the kick. 
             
            The snare offers 15 choices (instead of 3) with all the same sound adjustments as the kick.
             
            In the Producer Kit you can choose from among 8 sets of toms, whereas the stereo kit allows no tom swapping. 
             
            You can choose from among 7 sets of cymbals in a Producer kit, and from among 6 Hi Hats.
             
            Once you have configured your new drum kit, click the Save button at the bottom right of the Patch Library.
            Last Modified: Sep 23, 2013
            Helpful?
            Yes
            No
            One Moment Please
            Thanks for your feedback.
            0% of people found this helpful.
            Email this article
            Print this page
            • Last Modified: Sep 23, 2013
            • Article: HT5819
            • Views:

              0

              Additional Product Support Information

                Logic Pro X: Deploying across multiple Mac systems using Apple Remote Desktop, NetInstall, or NetRestore

                Posted in Apple Portable Computers

                Follow the steps below to deploy Logic Pro X across multiple Mac systems using Apple Remote Desktop, NetInstall, or NetRestore.

                 
                1. Ensure each target Mac meets Logic Pro X's minimum system requirements
                2. Ensure each target Mac is up to date. Check for available updates by choosing Software Update from the Apple () menu.
                3. On your administrator Mac system, download Logic Pro X from the Mac App Store. If you purchased a volume license, you can download Logic Pro X by entering one of the redemption codes provided.
                4. Deploy Logic Pro X to all of the target systems using Apple Remote Desktop, NetInstall, or NetRestore.
                  Note: Only the Mac system on which Logic Pro X was originally downloaded will be notified of application updates. To deploy the updated application across all target systems, download the new version of Logic Pro X from the Mac App Store on the original system. Then, deploy the new version to all of the target systems. 


                Last Modified: Sep 23, 2013
                Helpful?
                Yes
                No
                One Moment Please
                Thanks for your feedback.
                60% of people found this helpful.
                Email this article
                Print this page
                • Last Modified: Sep 23, 2013
                • Article: HT5061
                • Views:

                  17931
                • Rating:
                  • 60.0

                  (484 Responses)

                Additional Product Support Information